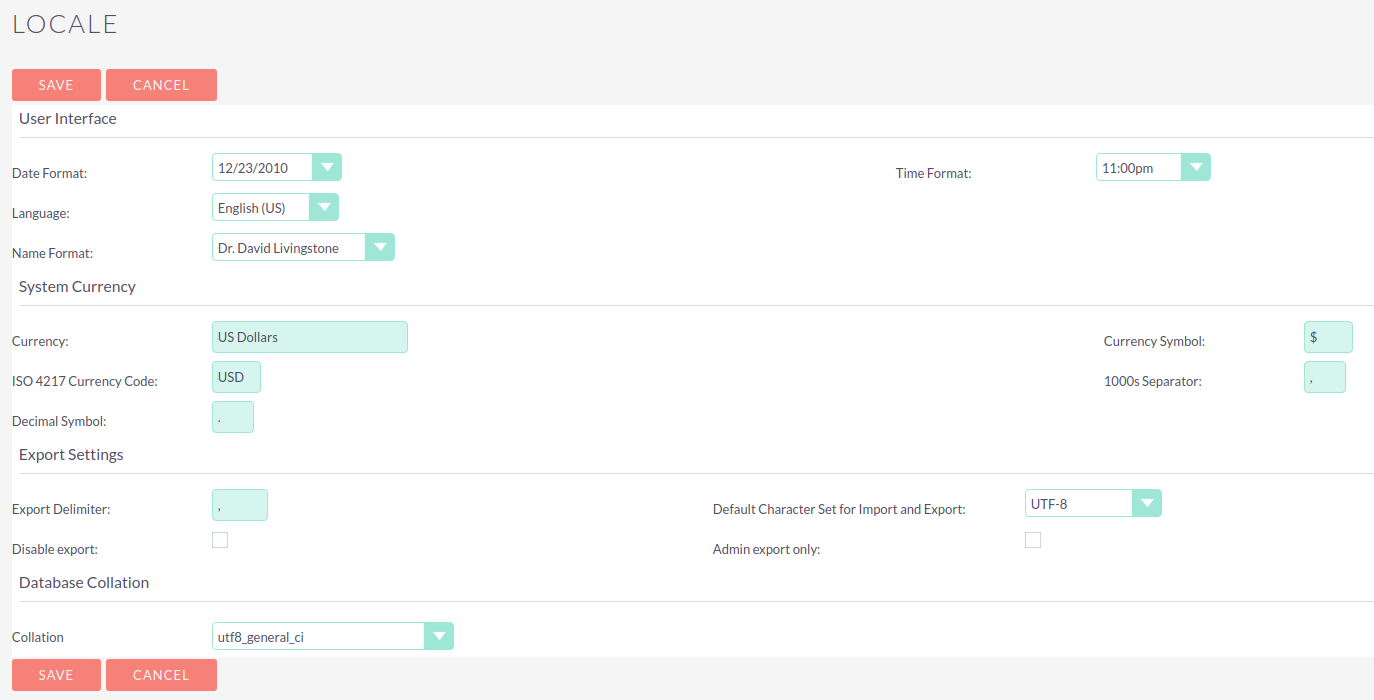
Note that date and time settings can be overridden by the user in their user profile
System
System Settings

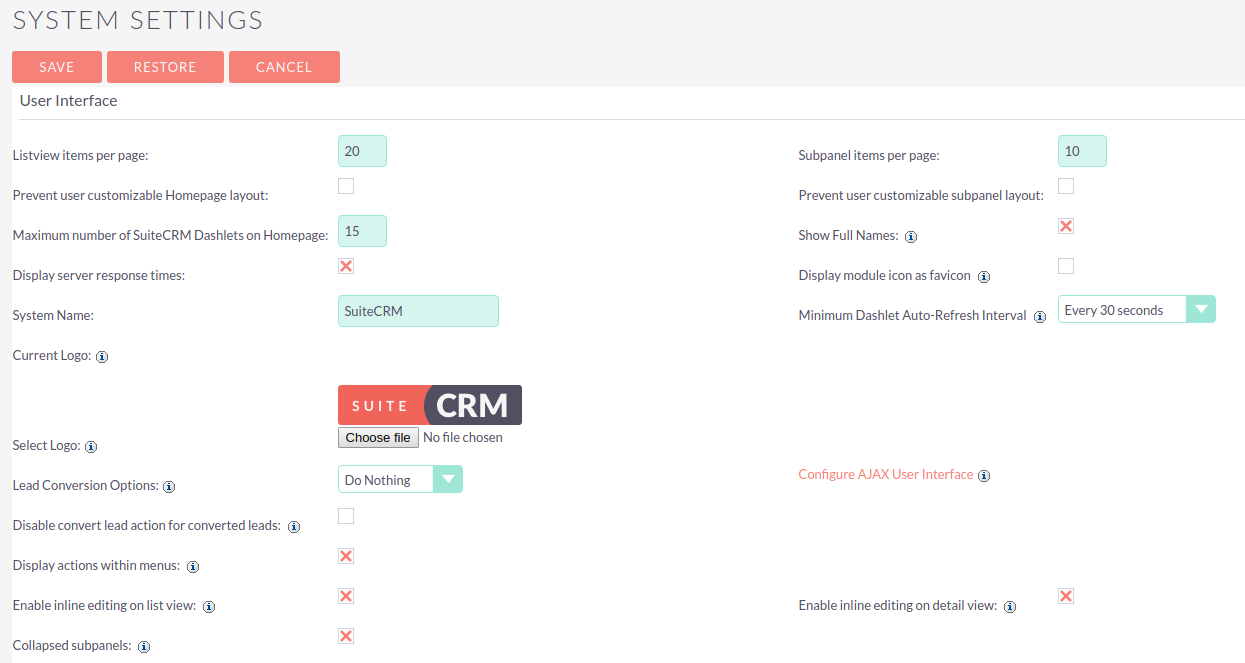
User Interface
These user interface settings apply system-wide, although some (for example Show Full Names) can be overridden by individual users in their user profile.
Listview items per page |
The number of records to display per page in the list view of each module. |
System Name |
This name will be displayed on the browser tab. |
Current Logo |
This shows the logo currently displayed on the login screen |
Select Logo |
Click Choose file to select logo file. Images can be .png or .jpg format. |
Lead Conversion Options |
|
Display actions within menus |
|
Enable inline editing |
Enables records to be edited from list or detail view by double clicking on the item to be edited. |
Show Full Names |
Displays full names for users, rather than usernames in Assigned To fields. |
Configure AJAX User Interface
Click the Configure Ajax User Interface link to display the configuration options.
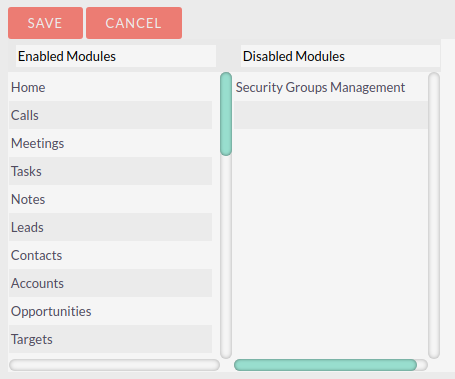
Drag and drop modules between the columns to enable/disable AJAX.
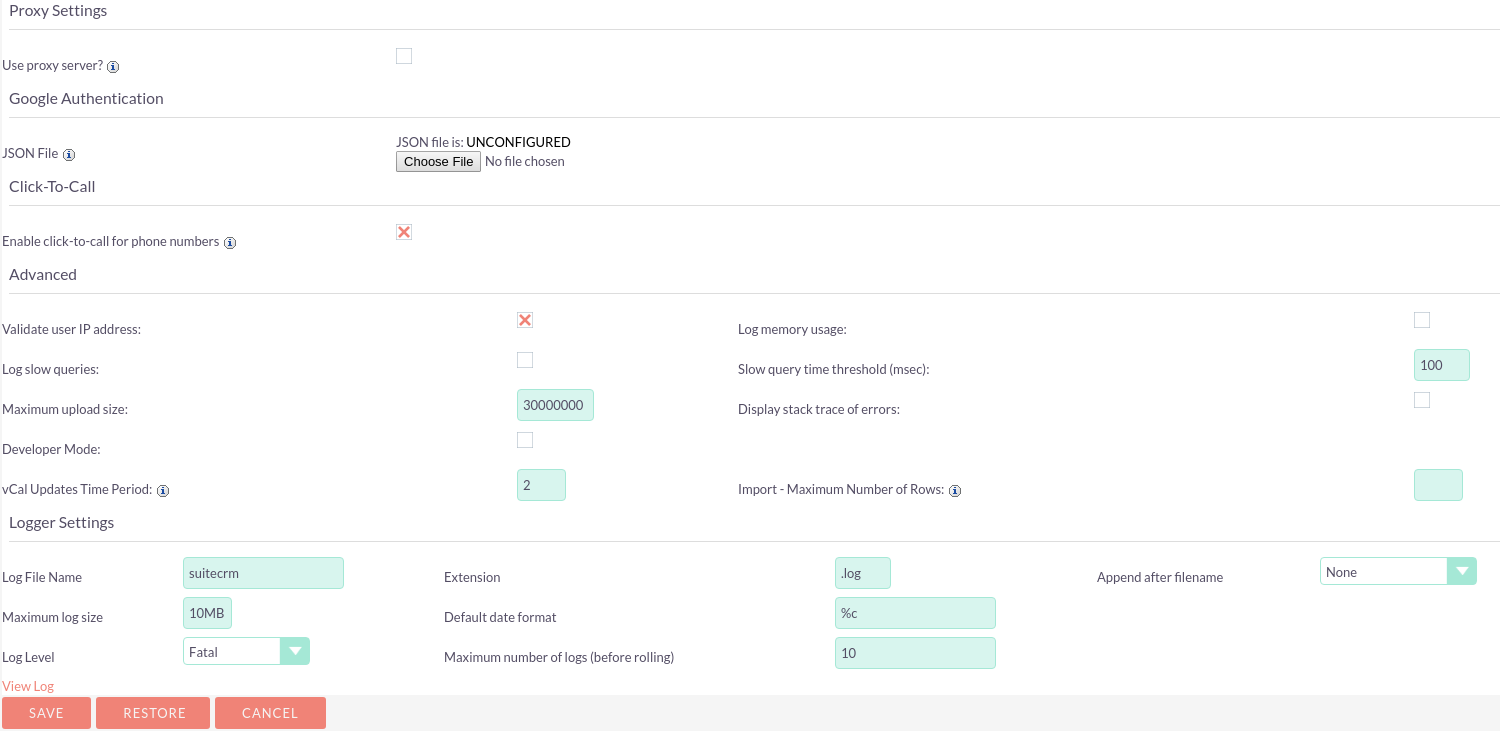
Proxy Settings
Select the Use Proxy server? checkbox to configure proxy server address and authentication settings.
Google Authentication
This is where you upload the JSON credential file for Google Calendar Sync.
See the Google Credentials and Syncing Section.
Advanced Settings
Developer Mode |
Turns off caching so that code changes to files will be seen immediately. See the Developer Guide for more information. |
vCal Updates Time Period |
Set the number of months in advance to show free/busy information for invitees when scheduling calls and meetings. |
Logger Settings
Specify log filename, extension and size as well as the log level here. See the chapter on logging for more information.
Click the View Log link to view the log file.
Import Wizard
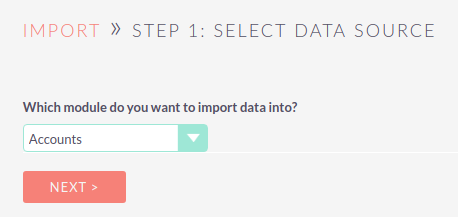
The Import Wizard is also available from the sidebar of all import-enabled SuiteCRM modules. Select the module to import data into and click NEXT > to launch the wizard.
See the Importing Records section for more information on importing records.
Locale
Set system-wide settings for locale here, including date and time formats, system currency and export settings. Currencies can be added to SuiteCRM via the Currencies panel.
Upgrade Wizard
The Upgrade Wizard provides a quick and simple way to upgrade your SuiteCRM application. Download the required upgrade package and check your system compatibility before running the wizard.
See Using the Upgrade Wizard for full instructions on upgrading.
Currencies
Use this section to add a currency to SuiteCRM. The default currency can be set in the Locale section.
Entering the ISO 4217 code for the currency will autofill the Currency Name and Currency Symbol fields.
You must also specify a currency conversion rate before saving the new currency settings.

Backups
The SuiteCRM application files can be backed up using this tool. Please note that you should also perform regular backups of your database - see the vendor’s documentation for details on how to do this.
Repair
Selecting Repair from the System Settings panel displays a wide range of repair options for SuiteCRM which will run automatically when the link is clicked. SuiteCRM may direct you to run particular Repair commands, for example following an upgrade using the Upgrade Wizard.
Quick Repair and Rebuild is the most often used command here, and will be required after installing a new module via Module Loader for example, or to display changes to code during development when Developer Mode is not set.
When running a Quick Repair and Rebuild, be sure to scroll to the bottom of the page to view any new SQL code which may need to be executed to ensure that your database tables are correctly synced with any changes that have been made.
The following functions are available to you in the section:
- Quick Repair and Rebuild
-
Repairs and rebuilds DB, Extensions, Vardefs, SuiteCRM Dashlets etc.
- Expand Column Width
-
Expands certain char, varchar and text columns in database (MSSQL ONLY)
- Rebuild .htaccess File
-
Rebuilds .htaccess to limit access to certain files directly
- Rebuild Config File
-
Rebuilds config.php by updating version and adding defaults when not explicitly declared
- Rebuild Relationships
-
Rebuilds relationship metadata and drops the cache file
- Rebuild Schedulers
-
Rebuilds out-of-the-box Scheduler Jobs
- Rebuild SuiteCRM Dashlets
-
Rebuilds the SuiteCRM Dashlets cache file
- Rebuild Javascript Languages
-
Rebuilds javascript versions of language files
- Rebuild JS Compressed Files
-
Copies original Full JS Source files and replaces existing compressed JS files
- Rebuild JS Grouping Files
-
Re-concatenates and overwrites existing group files with latest versions of group files
- Rebuild Minified JS Files
-
Copies original Full JS Source Files and minifies them, then replaces existing compressed files
- Repair JS Files
-
Compresses Existing JS files - includes any changes made, but does not overwrite original JS Source files
- Repair Non-Lowercase Fields
-
Repair mixed-case custom table(s) and metadata file(s) to fix issues where code expects lowercase field names
- Repair Roles
-
Repairs Roles by adding all new modules that support Access Controls, and by adding any new Access Controls to existing modules
- Repair Inbound Email Accounts
-
Repairs Inbound Email accounts and encrypts account passwords
- Sync Inbound Email Accounts
-
Sync Inbound Email Accounts and Emails
- Remove XSS
-
Removes XSS Vulnerabilities from the database
- Repair Activities
-
Repairs Activities (Calls, Meetings) end dates
- Enable/Disable Seed Users
-
Quickly enable or disable seed users populated during demo installation.
- Remove missed files from upload directory
-
Please note that removal can take a lot of time
Global Search
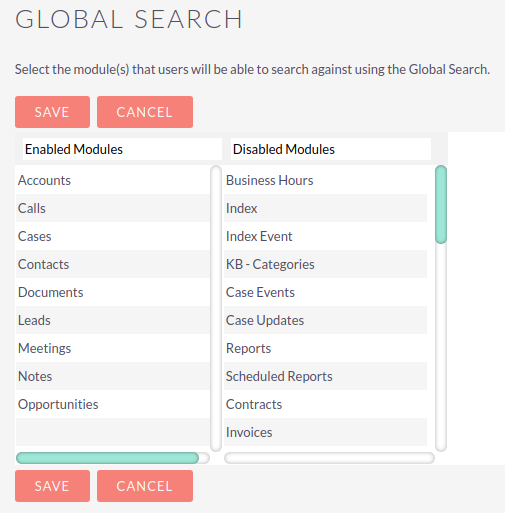
The Global Search functionality is used to search for records using the search bar on the main navigation menu. Add or remove modules from the Global Search here.
See the User Interface guide to the global search for more information.
Diagnostic Tool
The diagnostic tool allows you to gather system configuration information which can be downloaded via a .zip file for analysis.
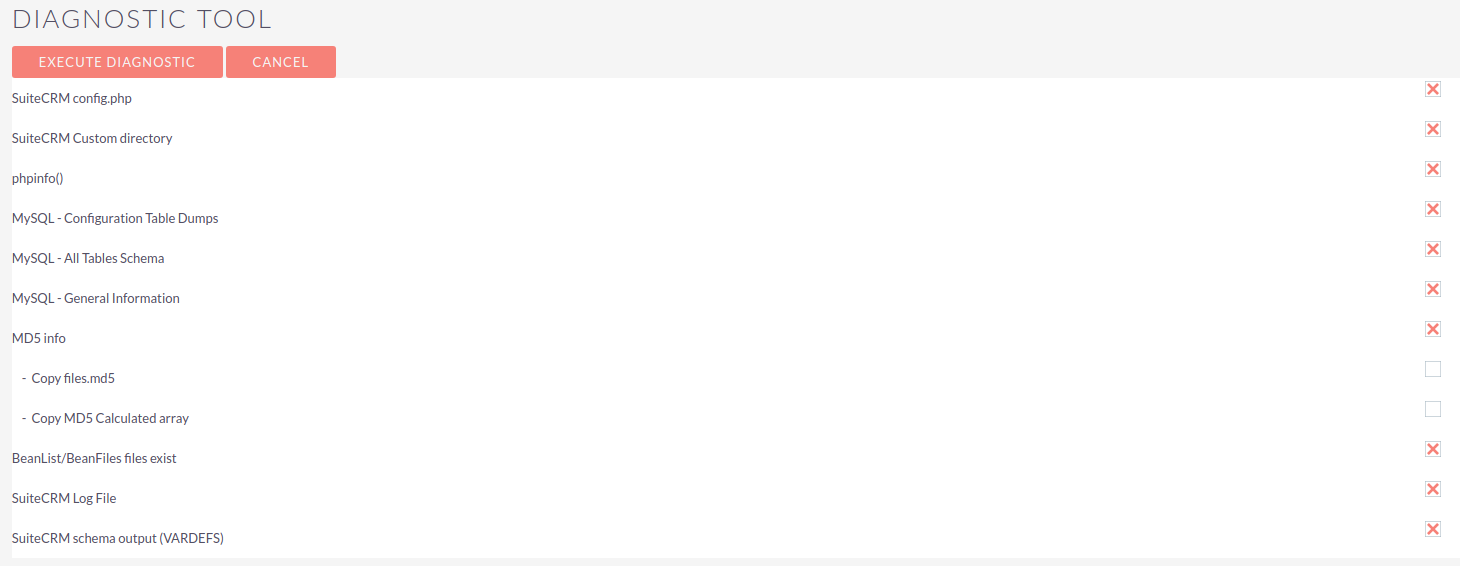
SuiteCRM config.php |
Includes a copy of the config.php file from the SuiteCRM root directory. This contains many of the system settings options such as date formats, currency information, password configuration alongside configuration details such as database settings and SuiteCRM version |
SuiteCRM Custom directory |
Includes a copy of the custom directory, which contains any field or layout customisations made, either through Studio or via code. |
phpinfo() |
Includes the output of the phpinfo() function, containing information about the php configuration on the server |
MySQL - Configuration Table Dumps |
Includes a folder MySQL/Table Dumps in the diagnostic zip file with an html file for each configuration table in SuiteCRM. Each file contains field definitions (field names, data types etc), indexes (name, type and fields in the index) and data from the relevant table. |
MySQL - All Tables Schema |
Includes the file MySQL/TableSchema/TableSchema.html with two sections for each table in SuiteCRM- field definitions (table name, data types etc) and indexes (name, type and fields in the index) |
MySQL - General information |
Includes a file MySQL/MySQL-General-info.html containing database information such as version number and character sets |
Select the information you require and click Execute Diagnostic
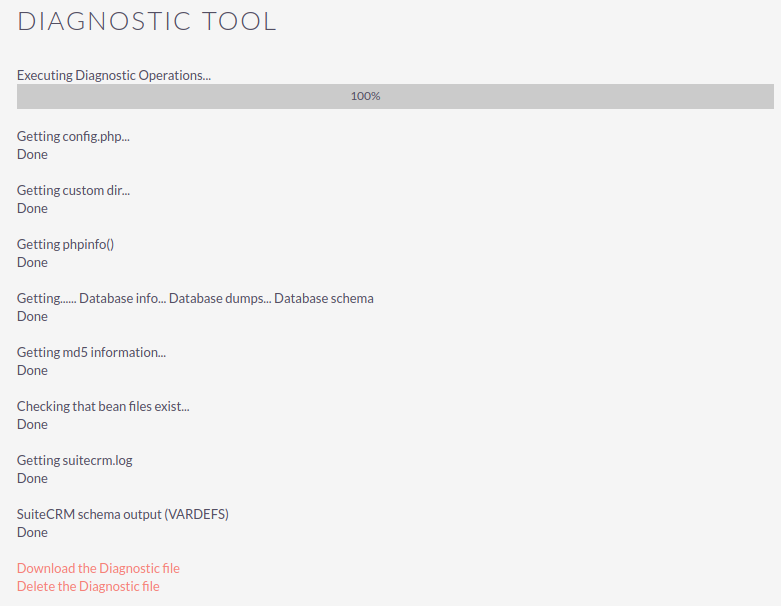
Once complete, click the link to download the zipped diagnostic file.
Connectors
This section to be completed.
Themes
From 7.9 onwards, only the SuiteP theme is available. For earlier versions, you can set the default theme and which other themes are available for users to select here.

From 7.10 onwards, there is a choice of theme colours for SuiteP which can be set from the User profile.
Scheduler
SuiteCRM uses a number of Scheduler jobs running at scheduled times, supporting functionality such as search indexing, workflows, email notifications, database maintenance and sending campaign emails.
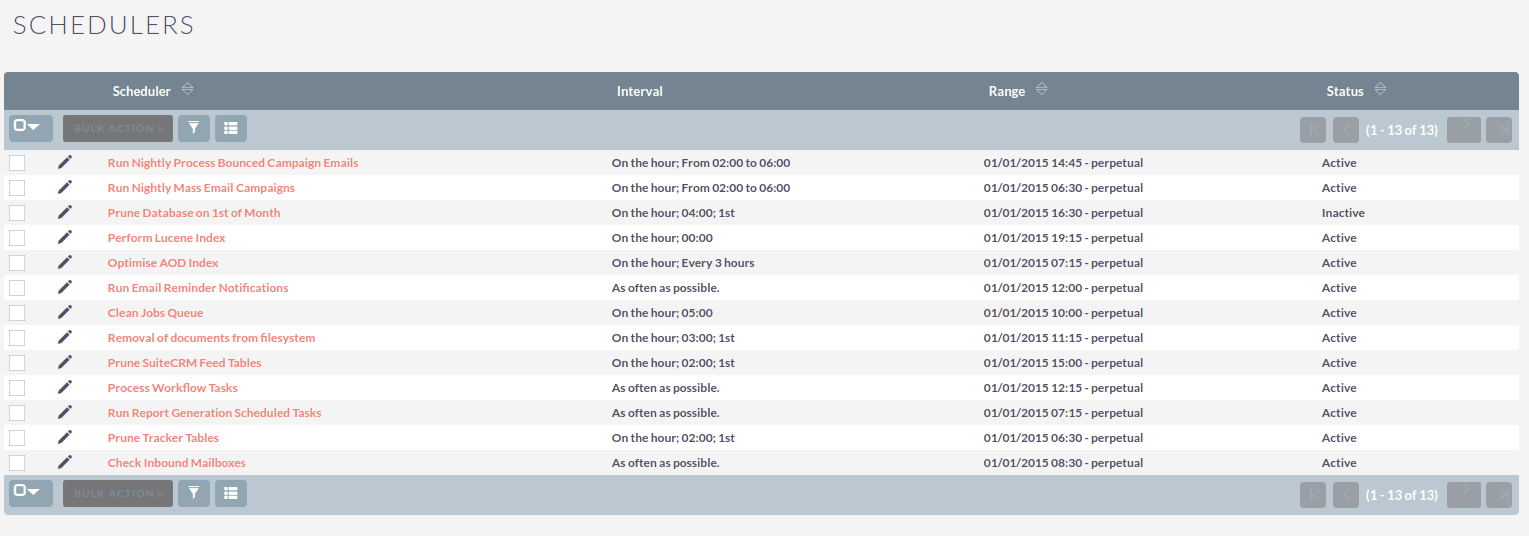
Setting up the Scheduler
Scheduler jobs need to be manually enabled. This is done by running a script called cron.php every minute. This, in turn, manages all SuiteCRM jobs according to their proper schedules.
In Windows this is setup using Task Scheduler, and in Linux and iOS, it is setup in crontab. Detailed instructions for your system will be displayed during installation and can also be found on the Schedulers page, under the list of scheduled jobs.
See Scheduler Jobs in SuiteCRM in Linux - the Definitive Guide for an in-depth guide to setting up and managing scheduled jobs in Linux.
Configuring Scheduled Jobs
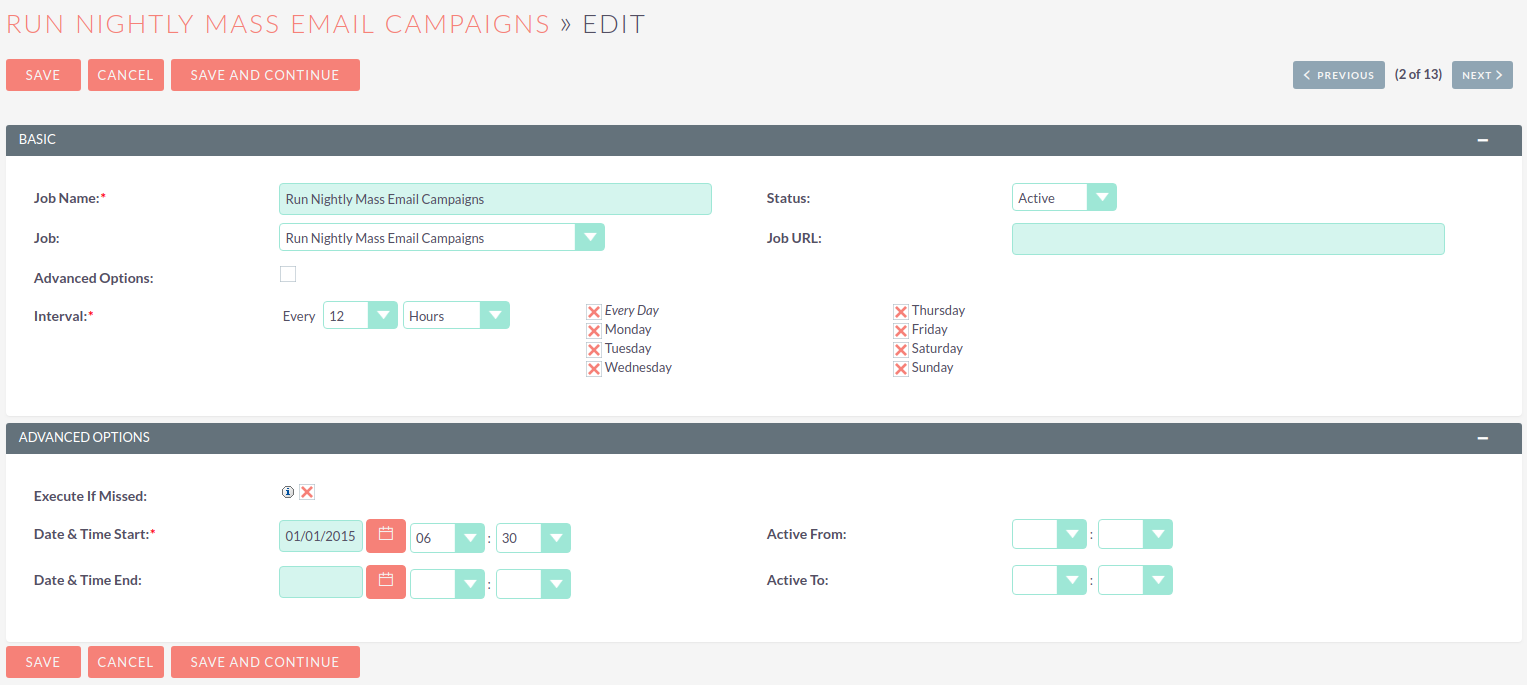
Click on a scheduled job to view settings

In edit mode, you can set the job status (only Active jobs will run) and configure the interval at which the job runs as well as the start time. Unchecking the 'Advanced Options' box will show a more user-friendly way to set the job interval if you are not familiar with the crontab notation. Re-checking Advanced Options will let you set the initial start time.
Activity Streams
By default the Activity Stream dashlet displays recent updates for the Opportunities, Contacts, Leads and Cases modules.
The Activity Stream admin panel allows you to configure what is displayed on the activity feed and which features are available to users.
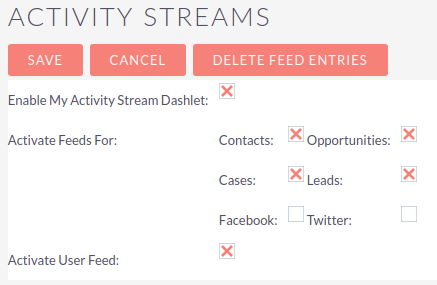
Enable MyActivity Stream Dashlet: |
Enables/disables the Activity Stream dashlet for all users |
Activate Feeds For: |
Select the modules to display activity for |
Activate User Feed: |
Allows users to enter messages in the status update field for broadcast to all users |
Please see the user interface guide for further information on how to use the Activity Stream.